Learn The Ins and Outs Of Indoors and Vertical Aquaponics! Part 2
For part 1 click this link:
Part 1
Vertical Aquaponics, Part 2:
Over this series, we’re including the information in our “Aquaponics For Millionaires” disclosure package at no charge. We’ve been selling this information package for $1,000 (because to a millionaire, that’s like a cup of coffee is to you, right?).
Let’s Talk Story About Vertical Aquaponics:
“Talking Story” in Hawaii means chatting with family, neighbors, and friends. We’re going to talk story about the high costs for lighting and air conditioning we’ve just found out about, and the relative efficiency and “waste heat” output of the different kinds of lights, so we can be sure you understand the situation.
This is the most important thing to understand about indoors growing: ALL lighting choices for ALL indoors growing technologies have the same drawback: they all put out waste heat that you have to remove with air conditioning.
In other words, you get to pay for your electricity twice: once when you buy it for the lights, and a second time to remove the waste heat the lights dump into your growing space.
(Below) Some not-efficient LED’s that help the indoor aquaponics farm Farmed Here go bankrupt in March of 2017.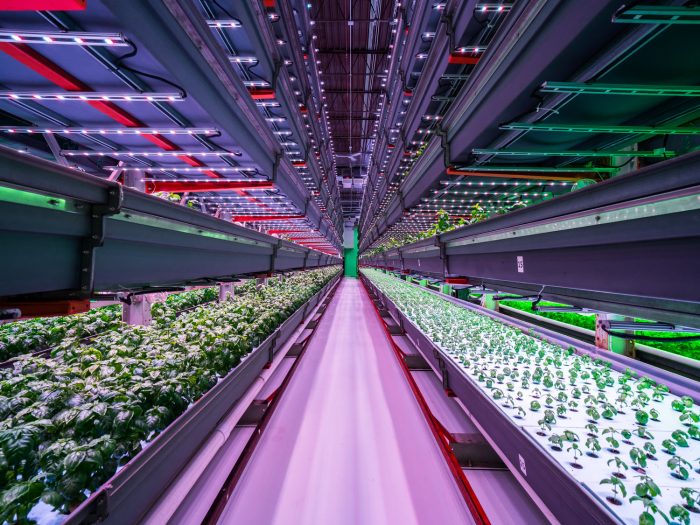
As we would say in our local pidgin: “Dis lighting ting is a real bummah, brah!”. If you don’t pay attention and understand the lighting issues and trade-offs, your indoor grow can get so economically out of hand it can go bankrupt in a short time.
LED LIGHT COMPARISON:
Let’s look at an example: Let’s compare a “top-end” 44% efficient 100-watt LED to an “average” inexpensive 100-watt LED that is 15% efficient. The top-end LED puts out 44 watts of light and 56 watts of waste heat.
Even though the average LED also uses 100 watts of power, it only puts out 15 watts of light, so you need three of them to put out the same amount of light as the 44% efficient, top-end LED puts out.
In other words, you have to buy three of the “inexpensive” lights to equal one of the “top-end” LED’s.
PAR LIGHT:
In addition, these inexpensive lights do not put out as much PAR light as the top-end LED’s do. What’s PAR light? PAR stands for Photosynthetically Active Light; that’s light that the plants actually use.
In addition to putting out less light, the inexpensive LED’s also put out less PAR light, so you really need four of them to equal the amount of usable light that one 44% efficient LED puts out. They don’t look so inexpensive now, do they, if you have to buy four times as many!
WASTE HEAT:
That’s not the end of the story: an LED that’s only 15% efficient puts out 85% waste heat. That’s 85 watts of waste heat from a 100-watt light. Since you have four of these lights, you are putting out 340 watts of waste heat (4 X 85 watts = 340w).
GETTING RID OF THAT WASTE HEAT:
At 340 watts of waste heat, the 4 “inexpensive” LED’s put out SIX TIMES AS MUCH WASTE HEAT AS THE “TOP-END” LED, which only puts out 56 watts of waste heat!
I hate shouting with all-caps, but this is REALLY important: can you see it yet? If you choose your lights based on price rather than efficiency, you have to buy four times as many inexpensive, inefficient lights; and that’s expensive!
Because those inefficient lights put out 6 times as much waste heat, you’ll also have to buy an A/C unit 6 times bigger, and spend 6 times as much paying for electricity to run it, FOREVER!
Does that mean that if I buy 44% efficient LED’s, my indoors aquaponic farm will be sure to make money?
It’s too early to tell; because we’ve just scratched the surface of the issues you’ll have to deal with.
More in Part 3 of this series!
Now, isn’t that naturally-lit aquaponic operation in a greenhouse starting to look more attractive?
We are now sending our newsletters in the form of links to these blog articles; they’re on our own website so you can search them easily using the “Find What You’re Looking For” search bar in the left hand column, or the “Categories Of Articles On Our Site” Category pulldown menu!
Learn The Ins and Outs Of Indoors and Vertical Aquaponics! Part 4
For parts 1 through 3 click these links:
Part 1
Part 2
Part 3
Vertical Aquaponics, Part 4:
First, some additional reading to round out your knowledge of the issues involved in vertical and indoors farming: here’s a link to download a scholarly critique by Stan Cox and David Van Tassel, plant breeding researchers at The Land Institute in Salina, Kansas (www.landinstitute.org), of Dickson Despommier’s claims that vertical farming is the answer to our current struggle to produce enough food with conventional farming.
How Many Plants Do You Need To Be Profitable?
In our last Part, we talked about the relative efficiency of the different kinds of lights available, and how inefficient lights result in a huge electric bill AND a huge air conditioning unit and bill.
We concluded that 40%-+ efficient LED’s were pretty much the only ones you can afford, because they’re the only ones that result in the absolute minimum of air conditioning required (if that sounds confusing, just re-read Part 3, above). It turns out that buying air conditioning and electricity to make up for using inefficient LED lights can really break your bank and bankrupt your farm!
In this Part, we’ll discuss how many plants you need to have in your space for it to be profitable. The most comprehensive way to show that information is a spreadsheet of an indoors aquaponics operation in a building of about 10,000 square feet, which you can download using the link below:
Click on this link to download the data in spreadsheet form.
For those of you who don’t “do” spreadsheets, we offer an example of how this works:
First, your farm has fixed costs for the building (either rent or mortgage), things like insurance, property tax, signage, advertising and marketing, accounting and legal expenses, and depreciation. Together they are referred to as fixed costs or “overhead”: that is, you have these expenses even if you don’t produce a single head of lettuce! They are expenses that don’t directly contribute to the production of a profit.
Your farm has other expenses too: these are usually called “operating expenses”, and are things directly connected to, and in proportion with, what is being produced. These are expenses such as seeds, potting mix, fish fingerlings, fish food, labor and management wages and benefits, electricity, water and natural gas, packaging, shipping your products to the buyer, and so on.
It’s obvious that if you add all your overhead costs and all your operating costs for a year, then divide by the dollar value of the plants you sold in a year (not produced, not the same thing at all!), then you’ll have an accurate picture of what it cost to produce each plant you sold. If you sold the plants for more than the total of your operating and overhead expenses, then you made a profit.
What’s not quite so obvious is that the more plants you have in your growing space, the less each plant costs you to grow. This is because your overhead costs you less per plant. If you have 100 plants and a yearly overhead of $10,000, then each plant costs you $100 worth of overhead to grow; obviously not a profitable business!
If you’ve got 40,000 plants with the same overhead, then your overhead per plant is 25 cents. Now it’s much more likely you can make a profit. You still need to add in the operating expense to get an accurate picture of your cost per plant. But operating expenses work in a similar fashion to overhead: the more plants you grow on a certain amount of operating expense, the less each plants costs, and the more likely you are to make a profit.
Where are we going with this? Just trying to show you how important it is that your proposed vertical or indoors growing technology have a minimum plant density per square foot of building area, or there’s no chance of it ever being profitable.
In our spreadsheet example, our growing technology holds 17.67 plants per square foot of building floor space, or a total of 176,700 plants in 10,000 square feet. This includes all plants at all stages of growth: those in the rafts as well as those in the sprouting tables. Check this number against the number of plants your proposed growing technology holds per square foot.
If yours is less, I’d be concerned. If it’s half or less, then feel free to give us a call. But we’ll show you exactly how we get that many plants in this small an area (using our CAD drawings of this facility) in one of our next Parts of this series.
(Below) Some not-efficient LED’s that help the Chicago indoor aquaponics farm Farmed Here go bankrupt in March 2017.
We’ll show you how to design a profitable indoors growing facility, and how you get that many plants in an indoors grow in Part 5 of this series!
Learn The Ins and Outs Of Indoors and Vertical Aquaponics! Part 5
For parts 1 through 4 click these links:
Part 1
Part 2
Part 3
Part 4
Vertical Aquaponics, Part 5:
High-Density Planting Strategies And Specialized Techniques For All “Greens” Crops
This is the million-dollar secret high-density planting strategy Susanne developed in 2010; although this is covered in much greater detail in our manuals and our live courses (17 pages in the manual, with lots of photos; and a 1-1/2 hour presentation in the live course), we have NEVER presented this information publicly except at our live courses. We use this in our proprietary vertical aquaponics systems, which you’ll see a little later in this series of articles.
We’ve put a simplified version into this article. All the information is here for you. If you’re smart; you can figure out our planting system. Susanne figured this out on NO information; she just invented it. She’s really smart. Want the complete version with lifetime free technical support? Purchase the Commercial Aquaponic DIY Package, or come to one of our 5-day live courses.
1. Soak your coconut coir in aquaponics water overnight, then it breaks up easily; mix with 40% vermiculite by eye to make potting mix; be sure to wear a cartridge respirator until the vermiculite is damp and no longer a breathing risk.
2. Fill 98-cell nursery trays by putting a number of trays on a work table and dumping the mix on top of them, then “sweeping it” from tray to tray until it fills them all; pick up each tray by the ends and bump it down onto the table 2 or 3 times to “settle” the mix in the cells.
3. Plant by hand by putting seeds directly on top of the potting mix in the trays, using pelleted seed whenever possible. There is no need to “dimple” the potting mix first; simply put the seed on top.
4. Sprinkle a light covering of plain vermiculite on top of each tray, wearing a cartridge respirator if using dry vermiculite. Top-water the trays with a watering can using aquaponic water, then place into the sprouting tables.
5. Keep sprouting tables and sprout trays at least 70 degrees F until the roots have just barely come out of the holes in the bottom of the nursery trays, then transfer into 2-inch slit pots and into your 55-hole 2-foot by 2-foot rafts in the aquaponics system. We use little 3-prong dessert forks for this; we tried everything and found they were perfect! When you do this transfer, CULL OUT all stunted and unhealthy plants and put them in the compost! (how can you do that to the poor little baby plants?) They never do catch up, and if you transfer them to the rafts, you’ll have wasted your labor and money on a substandard produce item you won’t be able to sell. We typically cull 15% here WHEN EVERYTHING IS PERFECT!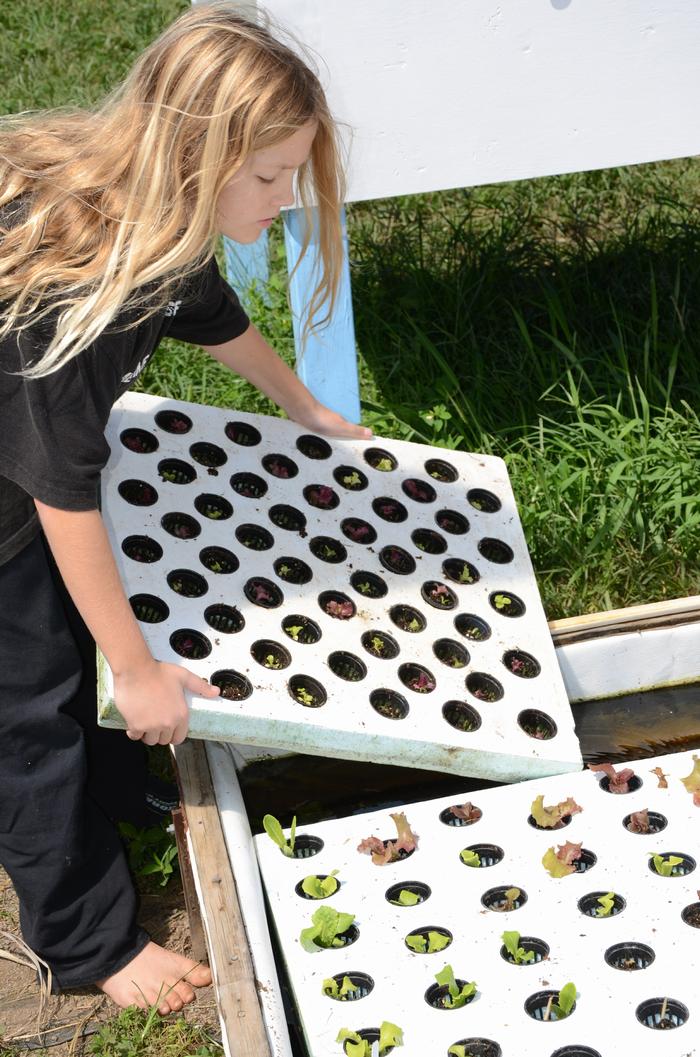
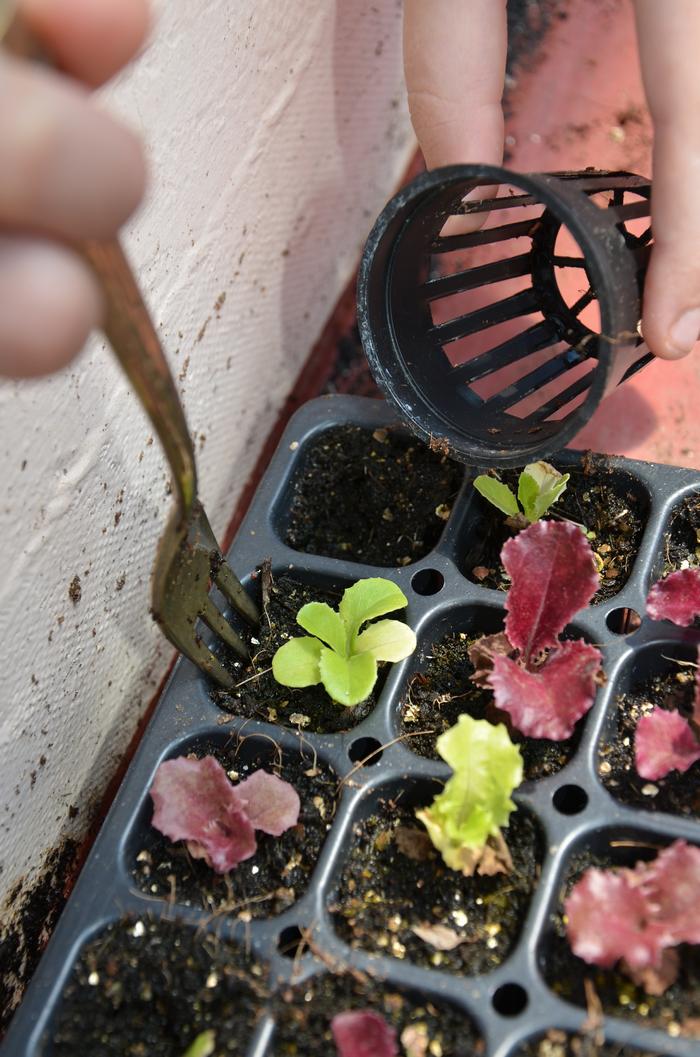
6. When the plants have grown around 4-5 inches high, transfer them from the 55-hole rafts to the 34-hole rafts for final grow-out and harvesting. Once again, CULL OUT all stunted and unhealthy plants during this transfer also! We typically cull 15% here WHEN EVERYTHING IS PERFECT! As a result of these two culling steps, each raft of greens we harvest out of the system is nearly perfect! 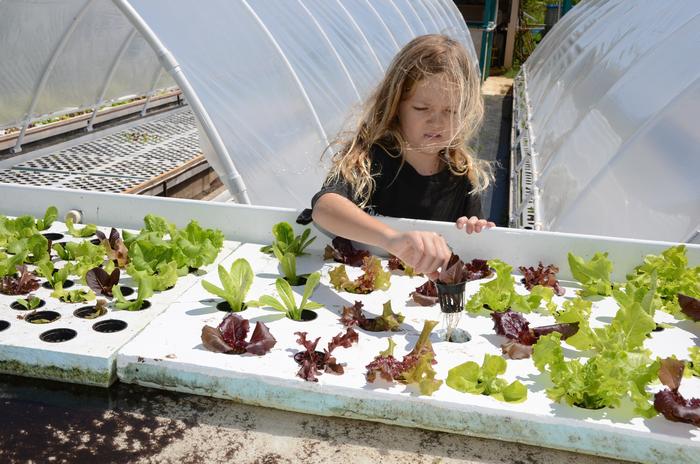
Because of the higher density of the plants in “the 55’s” (13-1/2 plants per square foot), you end up with an average of 6.45 plants per square foot of system area when combined with the 4 plants per square foot in the 34-hole 2-fot by 4-foot grow-out rafts.
7. Another way to use the 55’s is to plant green onion, chive, radish, or leek seeds directly into the 2-inch slit pots, and bypass the sprouting table completely, putting the pots directly into the aquaponics system for these plants to grow all the way to maturity. This puts an incredibly high density of these plants into each square foot of the system.
USDA Organic Certification For Your Aquaponic Farm:
We often hear: why bother? Doesn’t it cost money? Here’s some REALLY good reasons to do it:
Consumers are willing to pay 50-90% more for organically certified produce than conventionally grown produce; this means [Read more…]
Low Density Systems
“Low Density” refers to the relatively low density of fish required for excellent vegetable growth. Our Low Density (or LD) systems only require four major components: a fish tank, vegetable troughs, a water pump, and an air pump [Read more…]
Aeration, Air Pumps, Blowers, And Airstones
Aeration can be done in all kinds of ways using all kinds of equipment and methods: airlift pumps, water sprays, paddlewheels, rotors, blowers, compressors, etc. They all use MORE [Read more…]
Cheap Stuff And Value Engineering
When we got back from the UVI course in June 2007 we were excited about getting started in aquaponics, and immediately started pricing components. We were shocked to find that a 10′ fiberglass tank that cost $1,935 on the mainland had another $2,200 of shipping costs to get it to Hawaii. The smaller tanks we needed had similar painful price tags attached, along with everything else that had to get shipped in. The 2003 UVI “system cost” of $42,000 that they gave us during the 2007 course turned out to be $85,000 in Hawaii in 2007. This information forced us to rethink how we would build our systems, rather than just building identical systems to the ones UVI had. We started value engineering the systems instead of just shopping in catalogs.
(Below) An energy-efficient pump that only costs $678 with shipping; it pumps 40 gallons per minute, and uses $655 per year worth of electricity.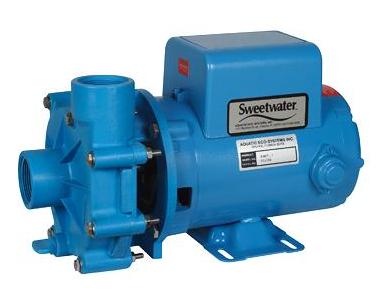
(Below) Another pump that only costs $379 with shipping; it pumps 50 gallons per minute (that’s a little better than our blue pump above). It looks cheaper on the surface, BUT it uses $6,845 per year worth of electricity, which is unacceptable compared to our blue pump above!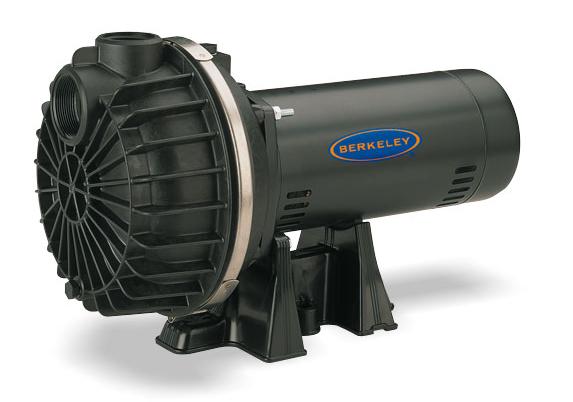
Which pump would you buy? Thought so.
Value engineering is when you research and develop a system component or subsystem that works just as well but costs less than your first selection. Because we had to build these systems on a limited amount of loan money (while living on the loan at the same time!) we were forced to review every single system component and subsystem to determine if there was a better way to do things. Because we knew we would forever be paying for any inefficiencies we designed into these systems, we were particularly careful to be thorough and precise in our research and design work.
Don’t confuse “Value Engineering” with “Cheap”! Don’t waste your money buying cheap pumps, air pumps, airstones, or other aquaponics equipment! We are always hearing about “I got a good cheap sump pump (or Jacuzzi pump) at a yard sale for $25. Will it work?”. Yes, it will work. However, the pumps that are specified with the different sized systems are exactly the right size for those systems, and will not use any more energy than necessary to do the job right.
Here’s an example of this problem: you buy a $25 Jacuzzi pump at a yard sale for a 64-square-foot MicroSystem instead of spending $62 (plus shipping!) for the right pump as specified in the materials list. You think you saved money, right? That’s until you realize that the right $62 pump only uses $93 of electricity a year, and the cheap pump uses $1,294 of electricity a year. This “savings” cost you an extra $1,201 a year, but go right ahead if you still feel it’s a deal.
The point here is that energy cost can be far more than any difference in original equipment cost, so you want to buy the most energy-efficient piece of equipment that will do the job, even if it costs four times as much as the cheap one! What you need to do is educate yourself, and think about energy, labor, and other costs associated with a purchase of a system component before buying it. What’s best is to find someone who’s using the same thing and has had no problems with it; the aquaponics forums are good for this. In this blog, we ONLY mention equipment by name that WORKS!
An old farmer friend on the Big Island said it best: “Cheap no good. Good no cheap”. Any time you think you’ve got a “deal”, look twice. You may be the one paying an extra $1,200 a year.
Weed Mat Discussion
In our first three systems, we put down a non-woven commercial grade weed mat PLUS a woven weed mat on top between the troughs before building the troughs, then covered it with 3″ of gravel. This solution was expensive, [Read more…]
Raft Discussion
WARNING! There has been discussion among attendees of our courses about alternatives to the Styrofoam rafts we use (which were approved for organic certification by Oregon Tilth), [Read more…]
Trough Liner And Construction
The original liner material for the troughs that we used in our first systems in 2007 (which is already approved for organic certification by Oregon Tilth) is a 23-mil, 3-layer, 15-year laminated LDPE material [Read more…]
