Value-Added Processing
This is the way to make the most money from your vegetable produce. In most states, you are allowed to cut once in the field then cut again and package in a certified processing facility, sometimes referred to as a “certified kitchen”.
Click here for a great video of this type of harvesting, done by Larry and Patty Yonashiro, which specifically shows how the rafts float right to the harvest area, so conveniently for the workers!
Let me describe our standard harvesting method for any greens: lettuce, chard, bok choy, etc.: a 2-foot by 4-foot raft full of mature product is picked out of the aquaponics trough, then brought over to the shaded harvesting area and set on sawhorses at waist height. A worker (who is working standing up in the shade, listening to their favorite tunes on a boombox with their friends!) then cuts heads off the pots, which remain in the raft. Holding the cut head in hand, the worker peels away and discards any bad leaves, then puts the rest of the plant into a 50-°F ice water bath about 8 inches deep that is in a sanitary chill tank right in front of the worker. Contrast this to our next photo, which is of “standard” lettuce harvesters working in “standard” field conditions.
(Below) Show this photo to any employees who complain how hard harvesting aquaponic lettuce is while standing up in the shade, listening to music and talking to their friends. This is lettuce harvesting in standard conditions: down on your knees in the mud (or dirt) in the rain (or sun). The field boss in the truck is nice and dry!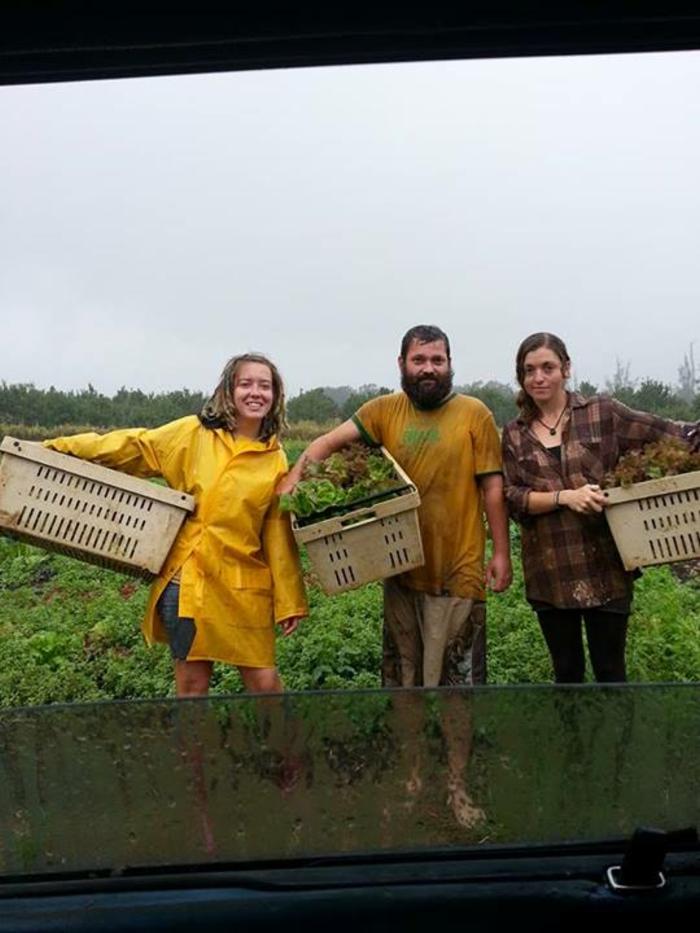
This whole process, from when the greens still have their (wet and alive) roots on in the raft to when they hit the ice water bath takes an average of ten seconds. The greens are rinsed there for a couple of minutes (and get almost down to 50°F temp), then strained out with a thing like a big colander, put in a sanitary basket, and brought inside the processing shed, where they go into a 45-degree ice water rinse in another tank that has two separate compartments. They are rinsed in one compartment, then transferred to the second one. They spend another 3 or 4 minutes total in these colder tanks.
We pull them out, spin them in a converted washing machine (State Health-Department-approved because it’s enamel and stainless steel inside, and is sterilizable with a water and hydrogen peroxide solution, and spins 5 pounds at a time). If you want to build one of these yourself instead of investing $5,400 in a new Hobart stainless-steel 5-pound greens spinner (yes, that’s how much they cost at the store!), you can click here for a description of how to make a DIY washing machine spinner.
(Below) Our $25 “One-Ton” lettuce spinner in action.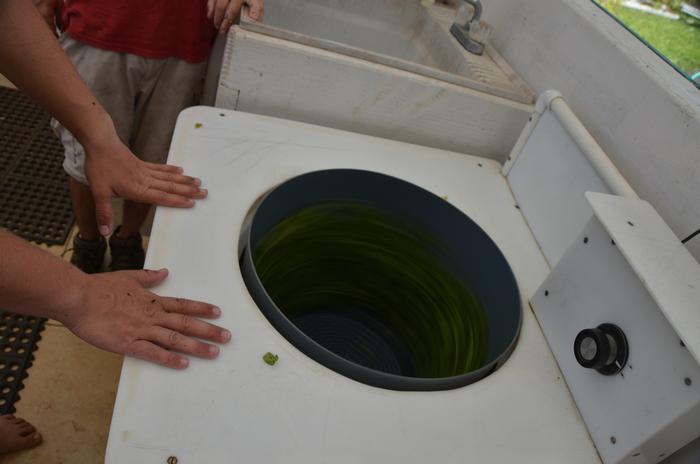
After spinning the greens dry, we weigh, bag, and heat-seal them. They then go into boxes, ten 1-pound bags to a box, and into a 38-degree walk-in fridge where they stay until delivery. They’re delivered in refrigerated delivery trucks, and hit the loading dock at below 40°F temp, and are then taken into a refrigerated storage/sales location. All this stuff is certified by your local State Health Department, for processing requirements you need to contact them and find out what their requirements are, because I’d just be able to give you the Hawaii requirements, which may differ.
If your greens are too warm, for too long, quality and shelf life will both suffer. With normal “field” harvesting, where the worker cuts into a basket, takes the basket to a truck or wagon, then to the processing facility, it can be as long as a half hour to hour from first cut at harvest until they get into the cooler shelf at the processing facility, or longer.
Even there, they will suffer: the cooler shelf only has cold air to cool the greens with, and air has poor heat transfer; in other words, even though they are now in a cool location, they’re still hot, will cool slowly, and their quality will suffer as a result. Cooling in ice water is almost instantaneous because the heat transfer of the liquid to the greens is so effective and fast.
We’ve never had any trouble with shelf life or quality on our greens, period. Even when we don’t cut and bag a product, but sell it whole, it still goes into at least the 50-degree chill tank, then is spun dry, then is chilled immediately (or as quickly as possible) down to 38°F. There are NO warm steps in our process, not for more than ten seconds. This is the way to keep your produce top-quality, with the longest shelf life and highest price for your efforts.
Also be sure to read #6 in our new manual section “Troubleshooting Case Studies/Technical Support”, because it covers someone who got this all wrong, and was having problems with it.
The easiest value-added processing for aquaponic vegetables involves cutting, sorting, packaging, and chilling of produce, with no cooking; as we just covered previously in #4 of this section. Even this simple a level of processing requires a State Health Department approved processing area with screened-in walls, self-closing doors, impermeable washable floor and walls up to 4 feet off the floor; at least one pre-chill tank in which vegetables are immersed in cold water to start bringing their temperature down towards the 38°F they will be stored at (and perhaps more than one); an ice machine for the ice used in the chill tank; a walk-in refrigerator for the pallets of vegetables you produce; a clean and dry storage area for bags, boxes, and plastic clamshells, etc., used in packaging; and a loading dock that a refrigerated truck with a 24-foot box can easily back up to and pull away from. All this may be available to rent from a local church commercial kitchen, or other community commercial kitchen, or farmer’s coop facility. You need to ask around to find what’s available, or plan on spending upwards of $20,000 putting your own facility in.
Also see “State Health Department Processing Requirements For Vegetables“, that describes some of the permits and regulations you need to follow to make more money with value-added processing. Do it if there’s any way you can. Get the money somehow to put together or rent a facility. You’ll make more money for less work, and you’ll create more employment for your family.
Leave a Reply